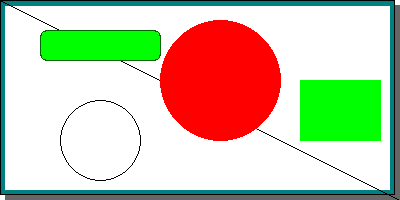
Figure 190: Drawing shapes on a canvas using a scale. [src]
The previous method using absolute coordinates works. But nothing more. It doesn't give you any chance to easily scale the image (unless you manually recalculate all used coordinates) , it gets tedious to work with pixel level resolution. Especially if you just like to draw a few basic shapes.
To help with this you can use a scale for the canvas. This lets you define a "work-space" of your choice. You can for example set the coordinates to be between X:0-10, Y:0-10. This makes it easier to position objects on the canvas. This also has two additional advantages:
To use this type of scaling you must make sure you include the file "jpgraph_canvtools.php" . In addition to the scaling class their are also a couple of other utility classes that may come in handy, especially the Shape class.
Using the scale is quite simple. You first instantiate a scale object passing the graph as a parameter and then specify the scale you want to use. This means you need to add the lines
  $scale
= new CanvasScale
($g);

$scale->Set(
0,$xmax,0
,$ymax);
to your code. You can then use one of the translation methods (for example CanvasScale::Translate()) in the canvas scale class to translate between your world coordinates and the absolute screen coordinates. This means you could take the code in the example above and just add the lines, for example,
  list(
$x1,$y1) = $this
->scale->Translate(
$x1,$y1);

list($x2,$y2) =
$this->scale->Translate
($x2,$y2);

$g->img->
Line($x1,$y1
,$x2,$y2);
Since this pattern has to be repeated for every object that has to be drawn it makes good sense to encapsulate this in a separate class. This is exactly why the canvas tools file also have a utility class called Shape This class is mainly a wrapper around the most commonly used methods in the basic Image class (with one important exception) and does all these the translation for you. Please see the class reference for a complete list of the available methods To set up the Shape class you instantiate it with the graphic context and the scale you want to use as argument as in
 $shape = new
Shape($g,$scale
);
You are then ready to use all the methods in the shape class. Using a scale and imitating the previous example we would get the source shown below.
 <?php


// $Id: canvasex03.php,v 1.1 2002/08/27 20:08:57 aditus Exp $

include
"../jpgraph.php";

include "../jpgraph_canvas.php";

include "../jpgraph_canvtools.php";


// Define work space

$xmax=20;

$ymax=20;


// Setup a basic canvas we can work

$g = new CanvasGraph(
400,200,'auto'
);

$g->SetMargin(
5,11,6
,11);

$g->SetShadow();

$g->SetMarginColor(
"teal");


// We need to stroke the plotarea and margin before we add the

// text since we otherwise would overwrite the text.

$g->InitFrame();


// Create a new scale

$scale
= new CanvasScale
($g);

$scale->Set(
0,$xmax,0
,$ymax);


// The shape class is wrapper around the Imgae class which translates

// the coordinates for us

$shape
= new Shape($g,
$scale);

$shape->SetColor(
'black');


// Add a black line

$shape->SetColor(
'black');

$shape->Line(
0,0,20
,20);


// .. and a circle (x,y,diameter)

$shape->Circle(
5,14,2
);


// .. and a filled circle (x,y,diameter)

$shape->SetColor(
'red');

$shape->FilledCircle(
11,8,3
);


// .. add a rectangle

$shape->SetColor(
'green');

$shape->FilledRectangle(15,
8,19,14
);


// .. add a filled rounded rectangle

$shape->SetColor(
'green');

$shape->FilledRoundedRectangle(2,
3,8,6
);

// .. with a darker border

$shape->SetColor(
'darkgreen');

$shape->RoundedRectangle(2,
3,8,6
);


// Stroke the graph

$g->Stroke();


?>
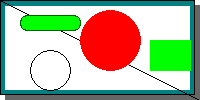
If we like to make a smaller image we could just change the image size and everything will be rescaled without any further code changes. SO for example making the image half the size would give the result

If we instead wanted to keep the image size but shrink the shapes we could just make the scale twice as large which would result in
We previously mentioned that the Shape class was a wrapper around the image class with one exception. So what is the exception? Well, glad you asked. The exception is that it contain an additional method which draws an "indented rectangle". An indented rectangle is a rectangle where one of it's four corners have been moved into the rectangle. You create an indented rectangle by calling either Shape::IndentedRectangle() or A few examples illustrates what this shape looks like.
As a final note we mention the class CanvasRectangleText Which can be used to add a text with a rounded rectangle (possibly filled) onto the canvas. The previous example where all the available fonts were drawn were using this class. We don't describe it further but refer the interested reader to the class reference and the 'listfontsex1.php' example file.